WorkBuddy Third-Party Key Setup — APIMaster.ai Custom Models Guide
How to add an APIMaster.ai OpenAI-compatible API key in WorkBuddy. Open Settings → Models → Add Model, set Endpoint, API Key, and Model Name, then select the custom model in chat.
WorkBuddy is a desktop AI agent (workspace files, skills/commands, multi-model switching). APIMaster.ai provides an OpenAI-compatible API — add a Custom Model in WorkBuddy to connect.
Get an API Key first. Keys are stored locally in
%USERPROFILE%\.workbuddy\models.json(Windows) or~/.workbuddy/models.json(macOS / Linux). Do not share them in screenshots or chat.
Prerequisites
- WorkBuddy desktop app installed and running.
- API Key copied from the APIMaster console.
- Target model id from the marketplace (e.g.
gpt-5.6-sol,claude-sonnet-4-6,deepseek-v4-pro).
Step 1 — Open custom model settings
Use either entry point:
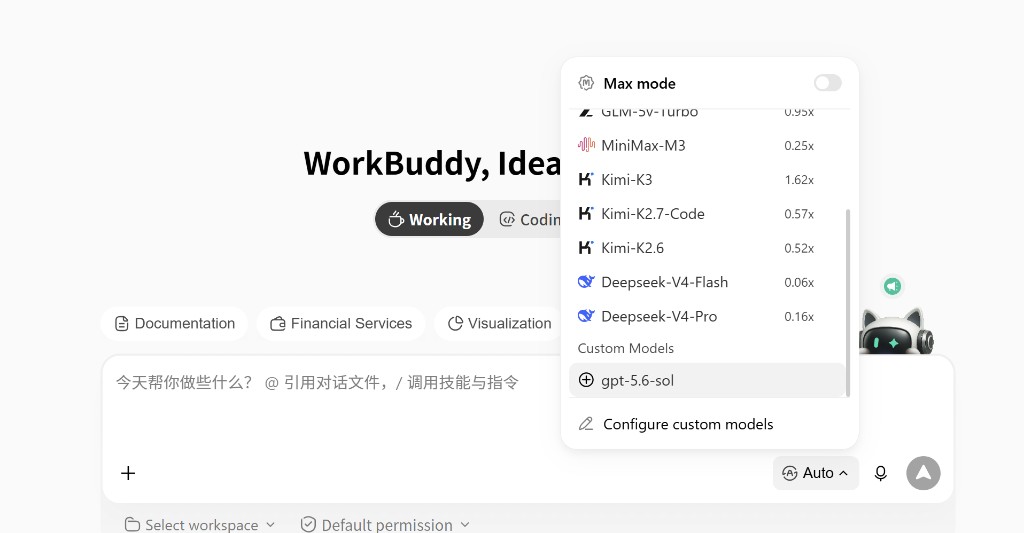
Option A (recommended) — from the chat model picker:
- Next to the input box, click the current model name (e.g. Auto).
- At the bottom of the menu, click Configure custom models.
Option B — from Settings:
- Open Settings.
- Select Models in the sidebar.
- Under CUSTOM MODELS, click + Add Model.
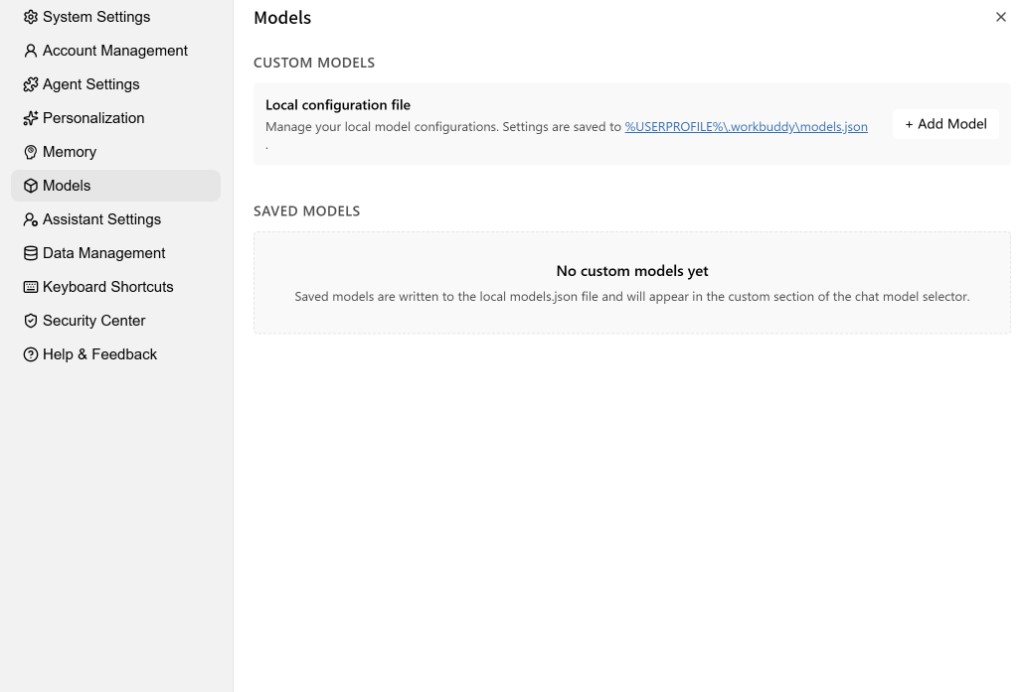
Local config file:
- Windows:
%USERPROFILE%\.workbuddy\models.json - macOS / Linux:
~/.workbuddy/models.json
Step 2 — Fill in APIMaster connection details
In the Add Model dialog (OpenAI-compatible API required):
| Field | Value |
|---|---|
| Provider | Custom |
| Endpoint | https://apimaster.ai/v1 (/v1 required) |
| API Key | Your APIMaster key |
| Model Name | Exact model id from the marketplace, e.g. gpt-5.6-sol, claude-sonnet-4-6 |
Advanced Settings (recommended):
| Option | Suggestion |
|---|---|
| Tool Calling | ✅ Enable (needed for agent tools / skills) |
| Image Input | ✅ Enable if the model supports vision |
| Reasoning | Optional — leave off for most chat models |
| Custom Protocol | ❌ Leave off (standard OpenAI-compatible) |
Leave Input / Output on Use provider default, or pick presets (e.g. Input 128K, Output 16K).
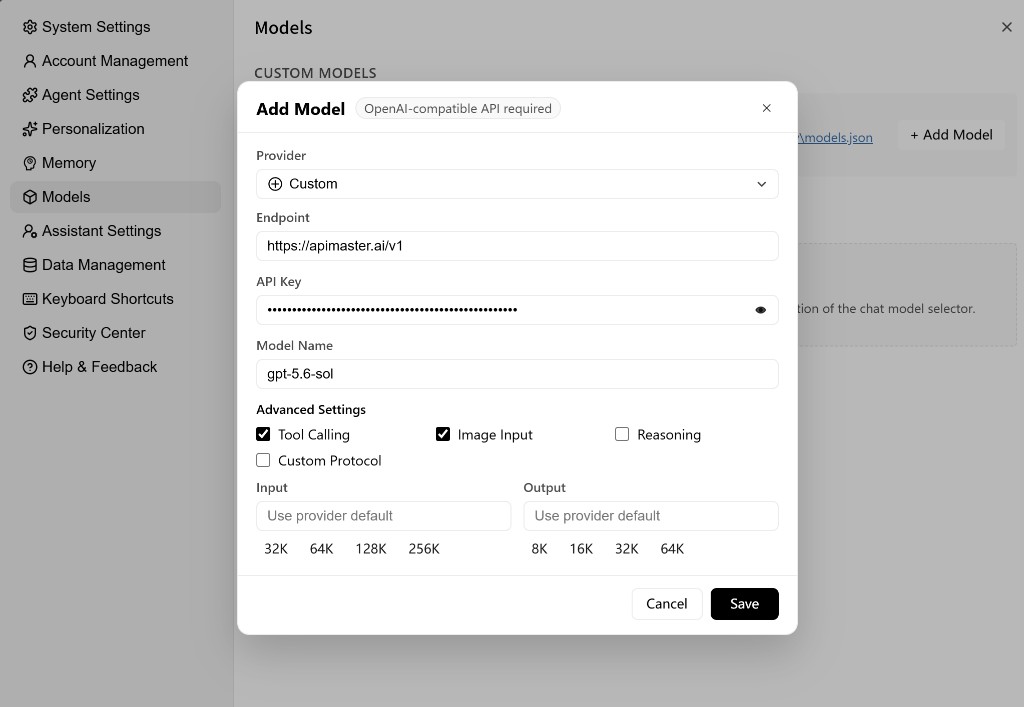
Click Save.
Notes:
- Model Name must match the marketplace id exactly (case and hyphens).
- To use another model, + Add Model again — reuse the same Endpoint and Key.
- Saved models appear under SAVED MODELS and in the chat picker’s Custom Models section.
Step 3 — Select the model in chat
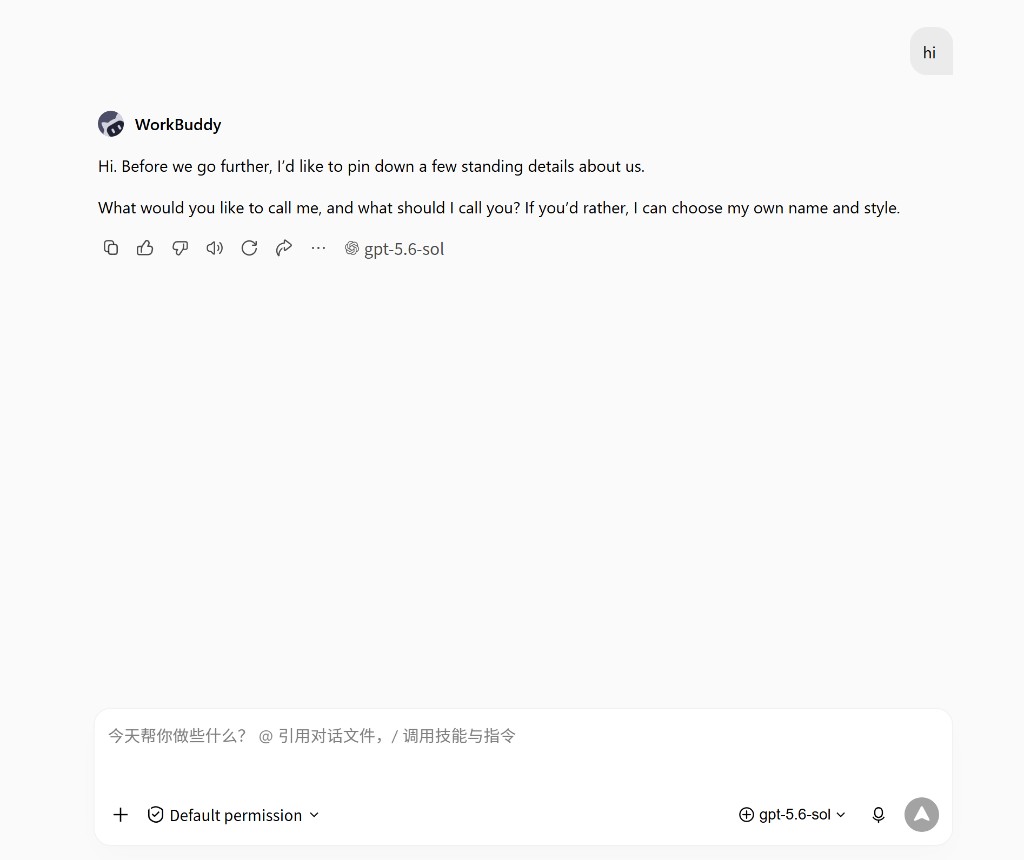
- Open the model picker on the main screen.
- Under Custom Models, select the model you added (e.g.
gpt-5.6-sol). - Send a test message (e.g.
hi). - The reply should show the model name next to the action bar — traffic is going through APIMaster.
Example model ids
Aligned with APIMaster GET /v1/models (availability depends on your account):
| model id | Notes |
|---|---|
gpt-5.6-sol |
GPT example used in screenshots |
gpt-5.4 / gpt-5.5 |
GPT family |
claude-sonnet-4-6 |
Claude Sonnet |
claude-opus-4-8 |
Claude Opus |
deepseek-v4-pro / deepseek-v4-flash |
DeepSeek |
minimax-m3 / kimi-k3 |
Other popular models |
Copy ids from the marketplace — do not guess aliases.
Troubleshooting
| Issue | Fix |
|---|---|
| 401 / Unauthorized | Re-paste API Key and Save |
| 404 / model not found | Re-copy Model Name from marketplace |
| Connection timeout | Endpoint must be https://apimaster.ai/v1; check network/proxy |
| Empty Custom Models list | Confirm Save; restart WorkBuddy |
| Tool calls fail | Enable Tool Calling in Advanced Settings |
| Can't find settings | Configure custom models in picker, or Settings → Models → + Add Model |
Checklist
- WorkBuddy installed
- Provider = Custom
- Endpoint =
https://apimaster.ai/v1 - Model Name from marketplace
- Tool Calling enabled if needed; clicked Save
- Model selectable under Custom Models and replies work