Kimi Code CLI — Third-Party API Key Setup (APIMaster Registry)
Configure APIMaster.ai as a custom provider in Kimi Code CLI via Custom Provider Registry. Paste registry.json and your Bearer token to use coding models like gpt-5.6-sol.
Kimi Code CLI setup
Complete the environment check and Get API Key first.
Kimi Code CLI can import a third-party provider through Custom provider registry (api.json). APIMaster.ai exposes a dynamic Registry: the model list is generated from your API Key permissions. When models are added or removed on the platform, later launches refresh automatically—you usually do not need to reconfigure.
| Item | Value |
|---|---|
| Registry URL | https://apimaster.ai/kimi/registry.json |
| Bearer token | Your APIMaster API Key from the console (sk-...) |
| Protocol | OpenAI-compatible Chat Completions (streaming / tool calling) |
The Registry only returns models suitable for coding agents (chat, streaming, tools, text reasoning). Image, video, embedding, and rerank models do not appear. Your key’s group and model allowlist directly affect the visible list.
Prerequisites
- Kimi Code CLI installed (screenshots use
0.31.1; command iskimi). - An APIMaster API Key from the console.
- A working terminal (Windows PowerShell / macOS Terminal / Linux).
Install per the official Kimi Code docs, then run:
kimi
If the model shows not set, follow the steps below and import APIMaster with /provider.
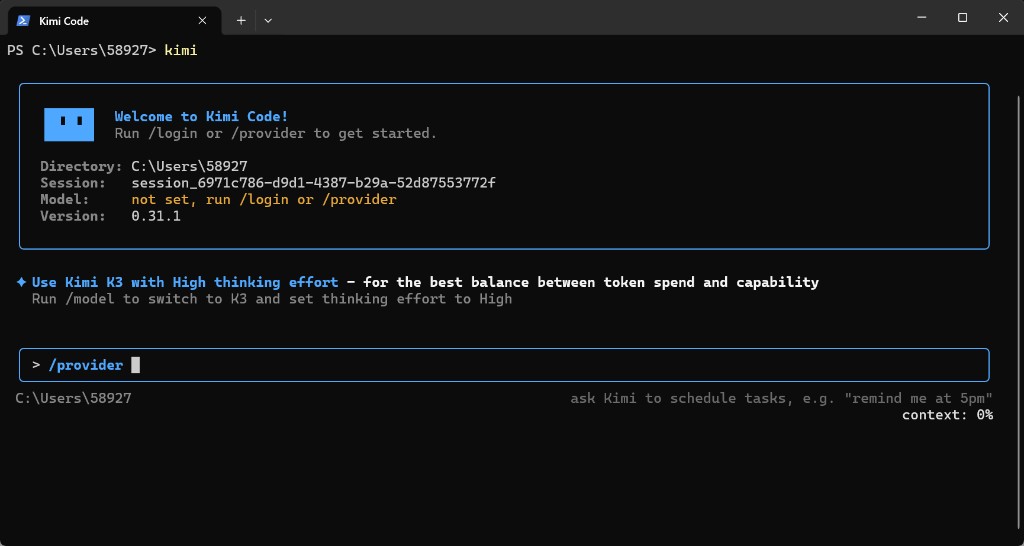
Step 1 — Launch and run /provider
- Run
kimi. - Type
/providerand press Enter.
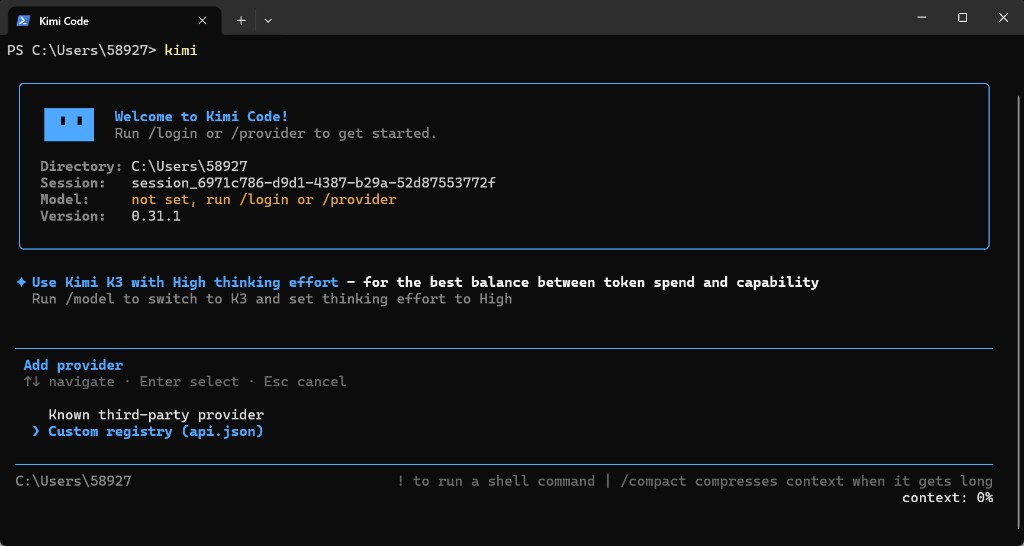
Step 2 — Choose Custom registry (api.json)
In the Add provider menu:
- Use ↑↓ to highlight Custom registry (api.json) (not Known third-party provider).
- Press Enter.
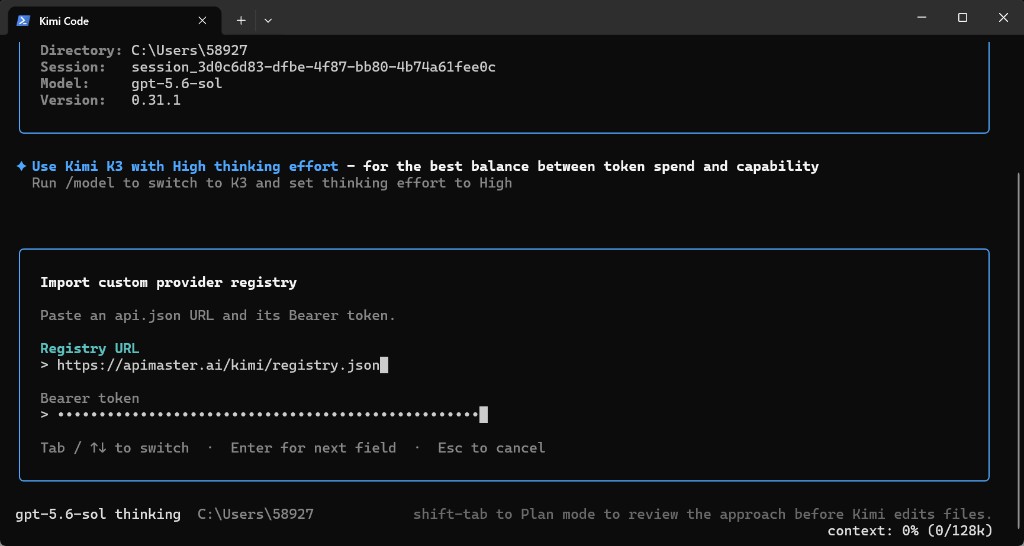
Step 3 — Paste Registry URL and Bearer token
In Import custom provider registry, fill in:
| Field | Value |
|---|---|
| Registry URL | https://apimaster.ai/kimi/registry.json |
| Bearer token | Your APIMaster API Key |
Use Tab / ↑↓ to switch fields, Enter to continue. Do not share the key in chat groups or public screenshots.
You can also import from the shell (same result):
kimi provider add https://apimaster.ai/kimi/registry.json --api-key sk-your-apimaster-key
Step 4 — Select a model under apimaster
After a successful import you should see something like:
Imported 1 provider from registry.
Then in Select a model:
- Press Tab to switch to the apimaster tab.
- Pick a model such as
gpt-5.6-sol,gpt-5.6-terra,gpt-5.5, orglm-5.2(depends on your key permissions and current marketplace listings). - Optionally set Thinking to On.
- Press Enter.
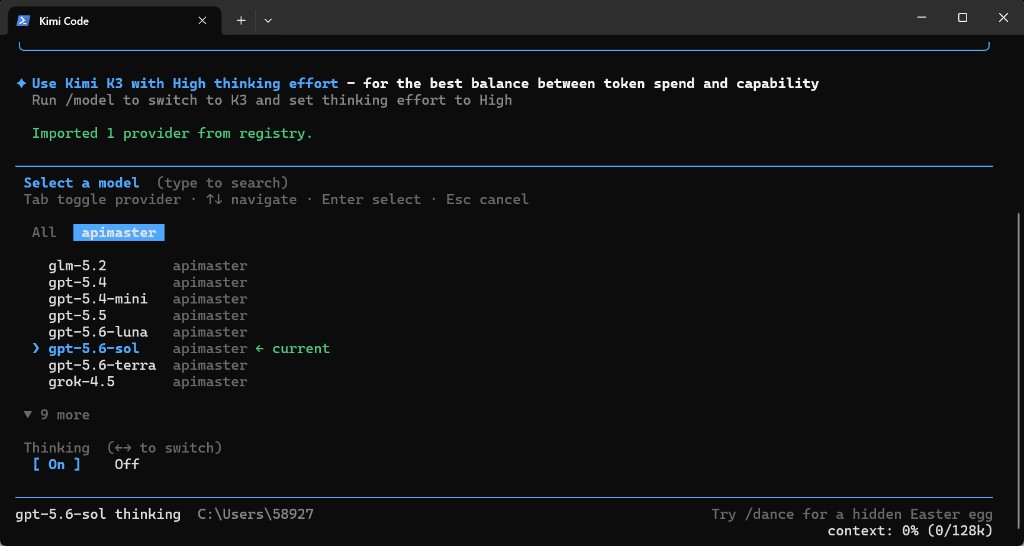
The status bar should show something like: gpt-5.6-sol thinking.
Step 5 — Send a test message
You may see a default similar to:
Default model set to apimaster/gpt-5.6-sol with thinking on.
Send a short message (e.g. hello). A normal reply means traffic is going through APIMaster.
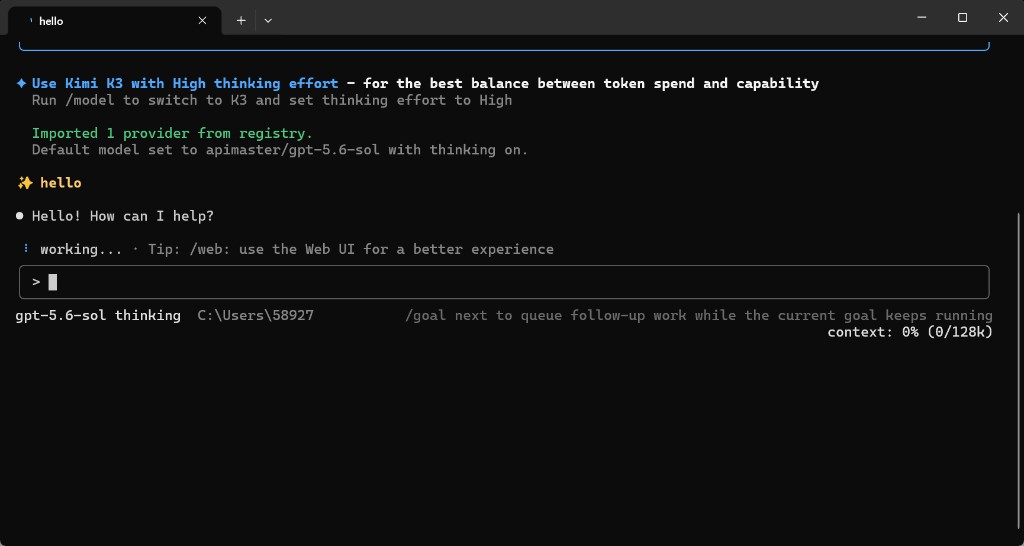
Use /model anytime to switch models.
Changing keys / missing models
| Situation | What to do |
|---|---|
| Switched to a key with different permissions | Run /provider again (or kimi provider add ...) |
| A model is missing from the list | Confirm it on the marketplace and check the token group / allowlist |
| Non-coding models missing | Expected — the Registry filters non-agent models |